
Yellowfin Image Management
The way images are used, stored and managed within Yellowfin gets a significant overhaul in the next release of Yellowfin’s Business Intelligence solution, Yellowfin 6.2.
Houston, we had a problem
Previously, you could only add images to Yellowfin from one place – the administration page. In this scenario, you uploaded your chosen image, assigning it a name and description. Then, to add that image to a specific development within Yellowfin (a report, chart background or presentation slide), you had to select the image from a drop-down list of image names. In instances where you had a large number of images to choose from, having to scroll through this list – and only being able to access that list from the administration page – delivered a potentially frustrating, restrictive and inefficient user experience.
The solution: Anywhere, anytime
The solution to our inefficient image management set-up?
Meet our new Image Manager, able to be accessed and used throughout Yellowfin.

The new Image Manager will be able to be activated from the Yellowfin navigation panel. The Image Manager will be displayed as a pop-up light-box, providing simple and convenient image management, allowing you to easily select and add images whenever and wherever needed.
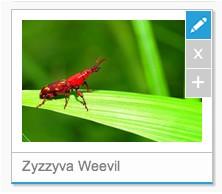
The image selection page is an intuitive, two-across, large image thumbnail scrolling view, complete with a handy search box. The search box eliminates the previously inescapable, and agonizingly long, scroll for that Zyzzyva (South American weevil) image.
The tag search can be used to narrow down the image list to a certain category of images – such as chart background images – that have been previously set-up by assigning this group an appropriate tag.
Moving forward, the Image Manager will be used anytime you need to select an image. But, it also incorporates additional functionality, allowing you to view, edit and delete images and image details.
Making images more searchable
Now, when adding images to Yellowfin through the Image Manager, you simply upload the image, enter a name and description, and then… you add your chosen tags!
New image management functionality within the soon-to-be released Image Manager allows you to add tags to each image, in order to make them easier to find and categorize for later use.

How did we do it?
Designing the Image Manager pop-up
The Image Manager was implemented inside a light-box div container. The scrolling images display page was originally executed by using one wide div, and assigning right float attributes to every second image. However, floating the image div caused layout issues in certain Internet Explorer builds. To combat this issue, we implemented two separate divs, side-by-side, and assigned an image into each div manually to ensure the correct layout across browsers.
The image thumbnails have fixed widths, but the heights are dynamically calculated, with their div heights resized using jQuery when they are loaded for the page. The jQuery framework is beginning to be used all over Yellowfin’s code. It is an easier way to use Javascript, and eliminates cross-browser issues. More information can be found HERE >
Image Manager search functionality
The search function within the Image Manager returns results by matching the search string against the image name, description and assigned tags.