

How to Add a ‘Back to Top’ Button to Your Yellowfin Dashboard
Welcome back to Yellowfin Japan’s ‘How to?’ blog series!
In our previous blog, we went through how to create big number and vertical column charts in Yellowfin, and the many different charting options available in Yellowfin Canvas. Before we re-visit our regular series, we want to share a shorter dashboard walkthrough.
In this blog, we would like to show you how to implement the Back to Top button on your dashboard, as a substitute for keyboard shortcuts, and to provide your team with an example of adding custom action-based buttons to your Yellowfin dashboards.
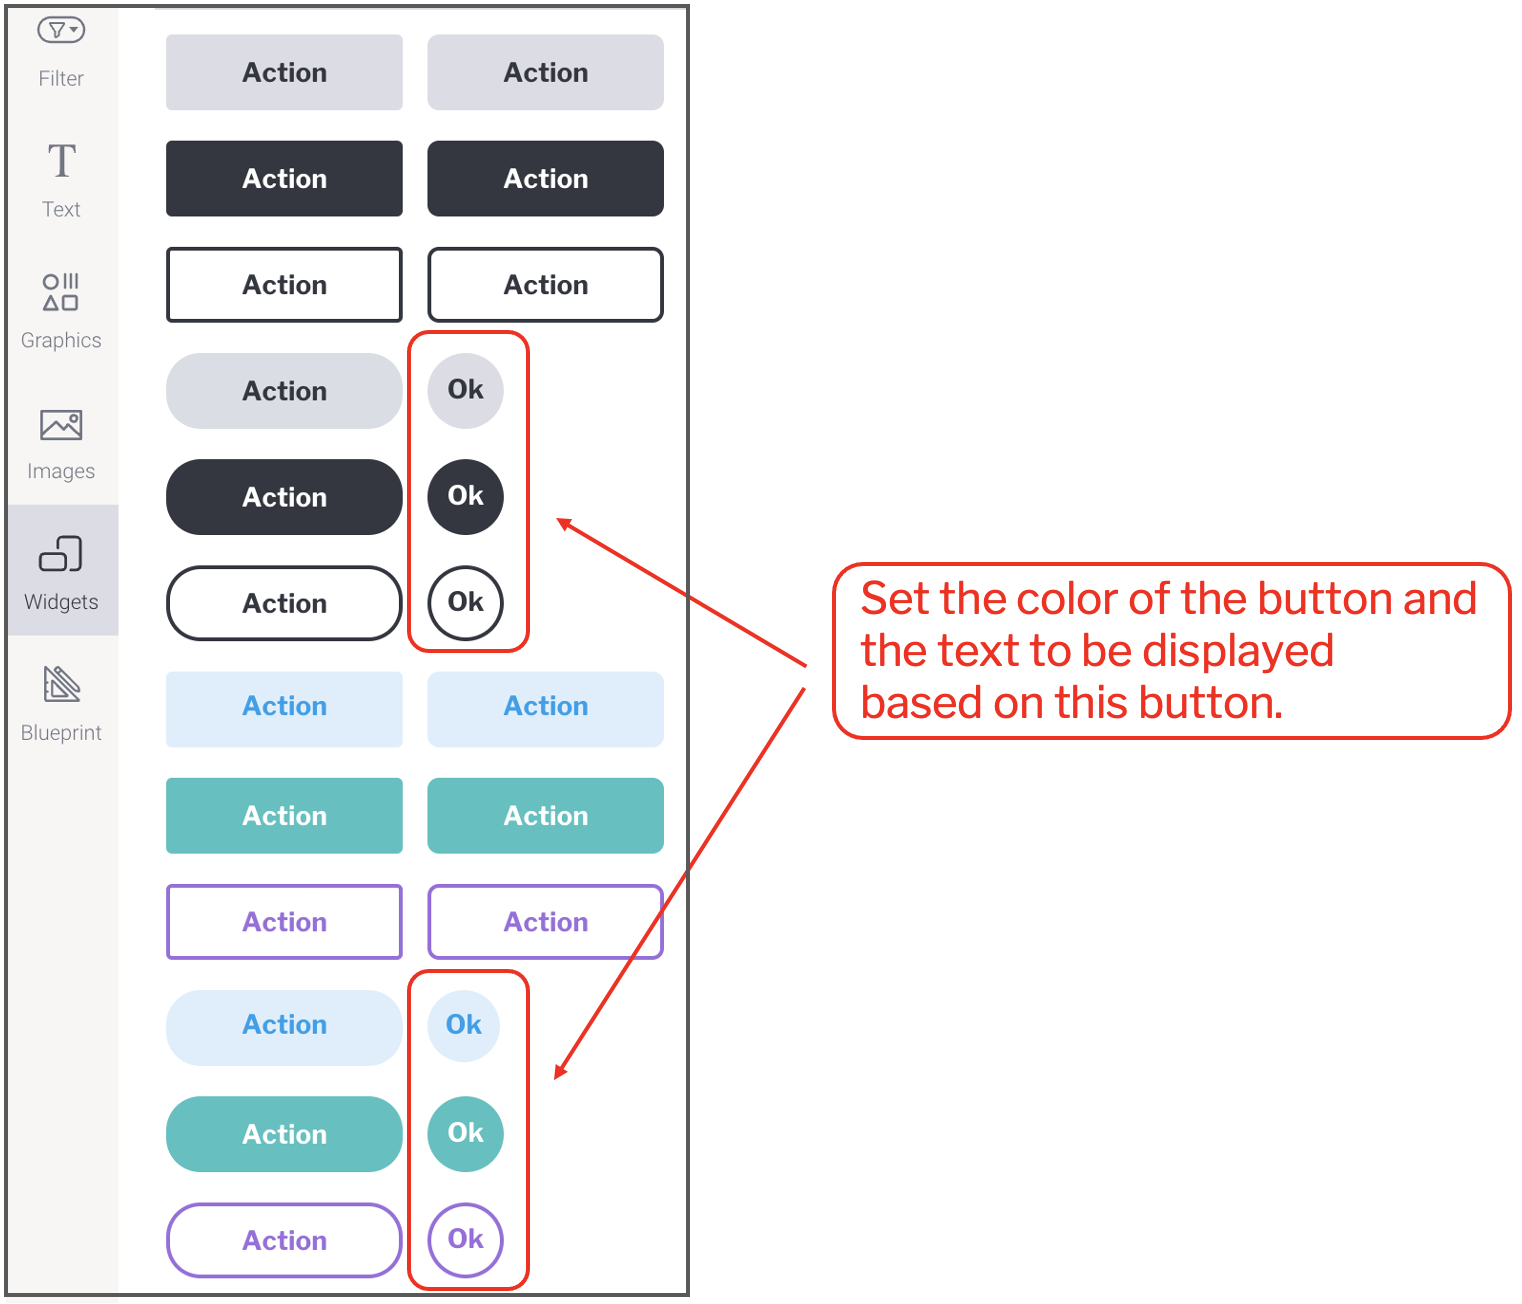
The Back to Top button can be easily implemented by using an action button. We recommend that you use the rounded one to be based on it. Place the action button at an appropriate position on the canvas. The final display position will be adjusted later in Code Mode, so it does not matter where you place it, but it is a good idea to place it at the bottom of your dashboard at first, to check the behavior of the action button you have created.
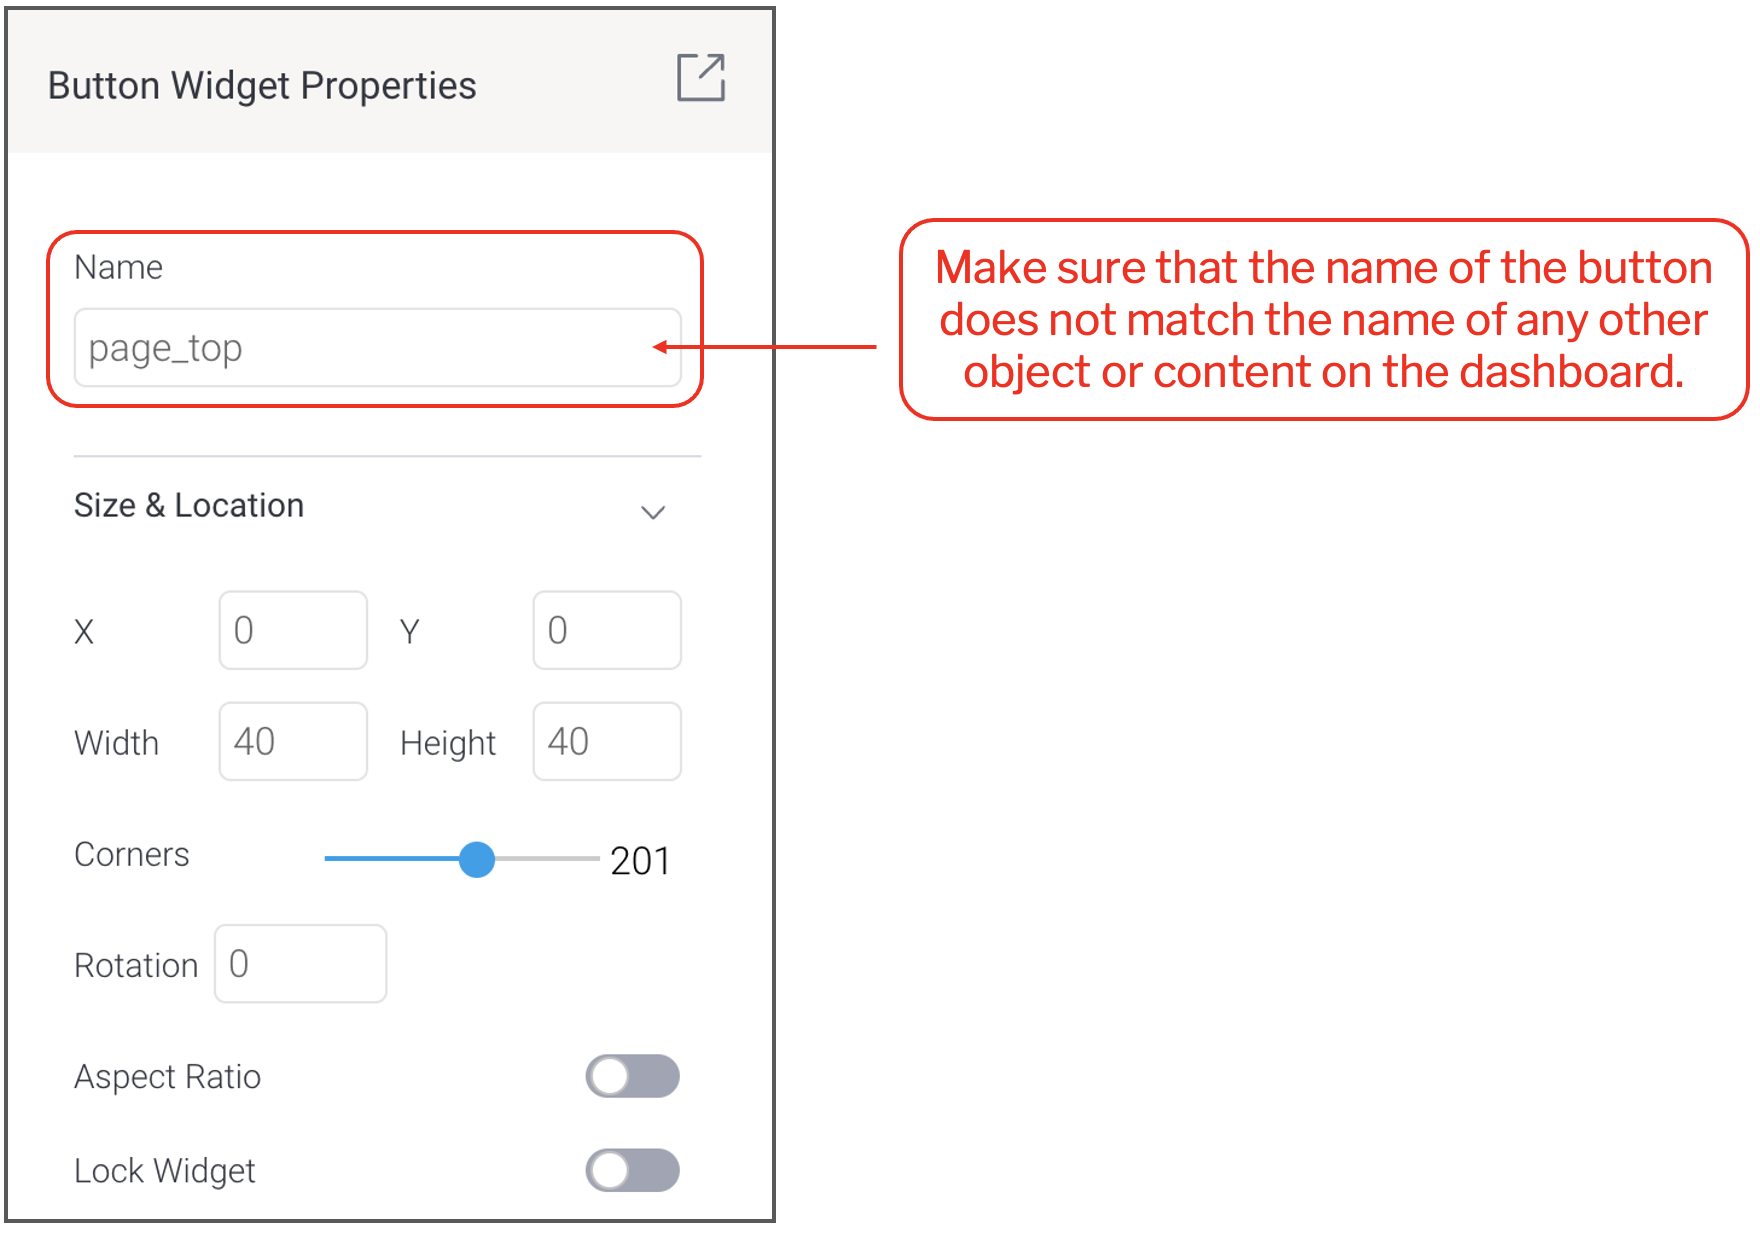
 Name the action button for use in code mode. You can name it anything you like as long as it does not match the same name as any other object on the dashboard, but for the sake of convenience, we will name our example ‘page_top’.
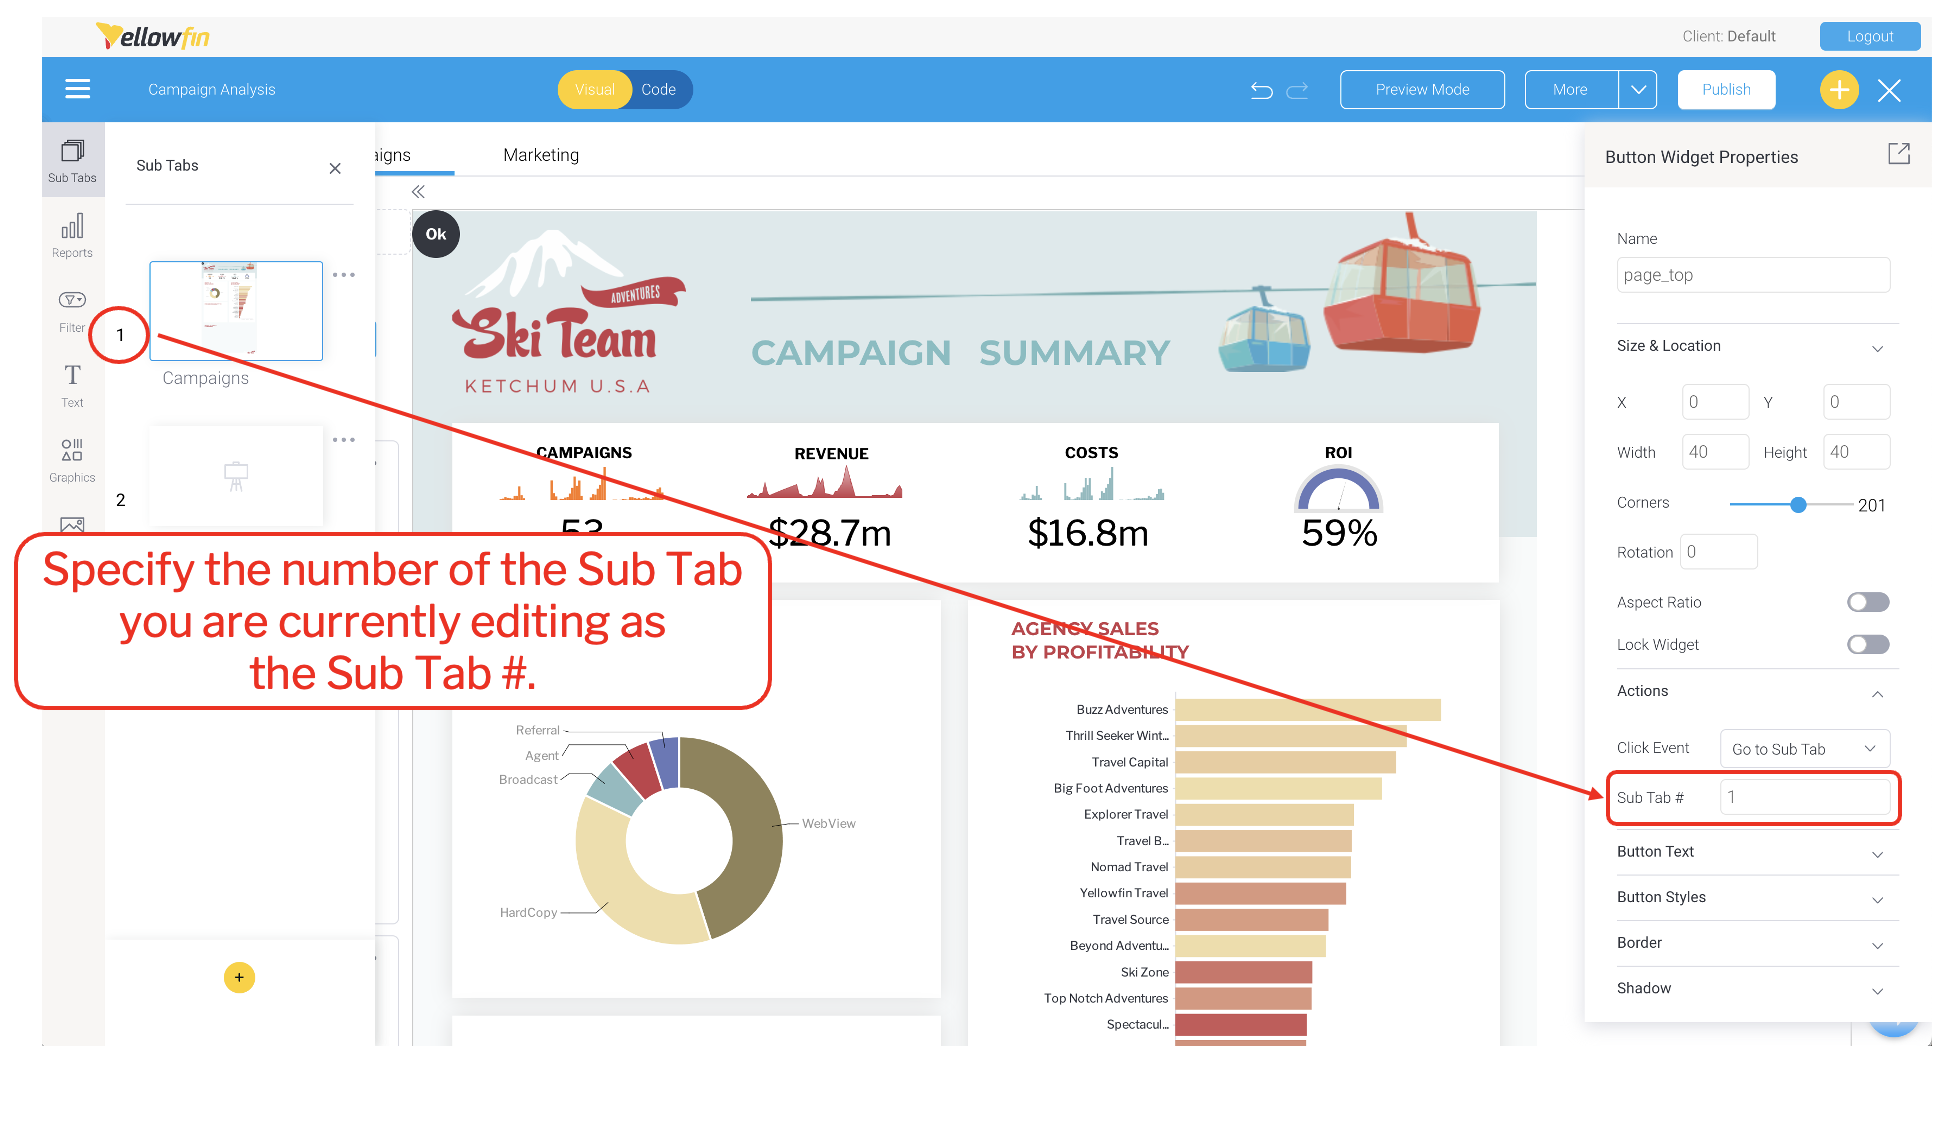
 Set the click event to ‘Go to sub tab’ and specify the number of the destination tab as the number of the tab itself. The number of the currently edited sub tab can be checked from the ‘Sub Tabs’ menu in the left side menu.
Note: If you specify the number of another sub tab, the button will be used to go to that tab.
Set the click event to ‘Go to sub tab’ and specify the number of the destination tab as the number of the tab itself. The number of the currently edited sub tab can be checked from the ‘Sub Tabs’ menu in the left side menu.
Note: If you specify the number of another sub tab, the button will be used to go to that tab.
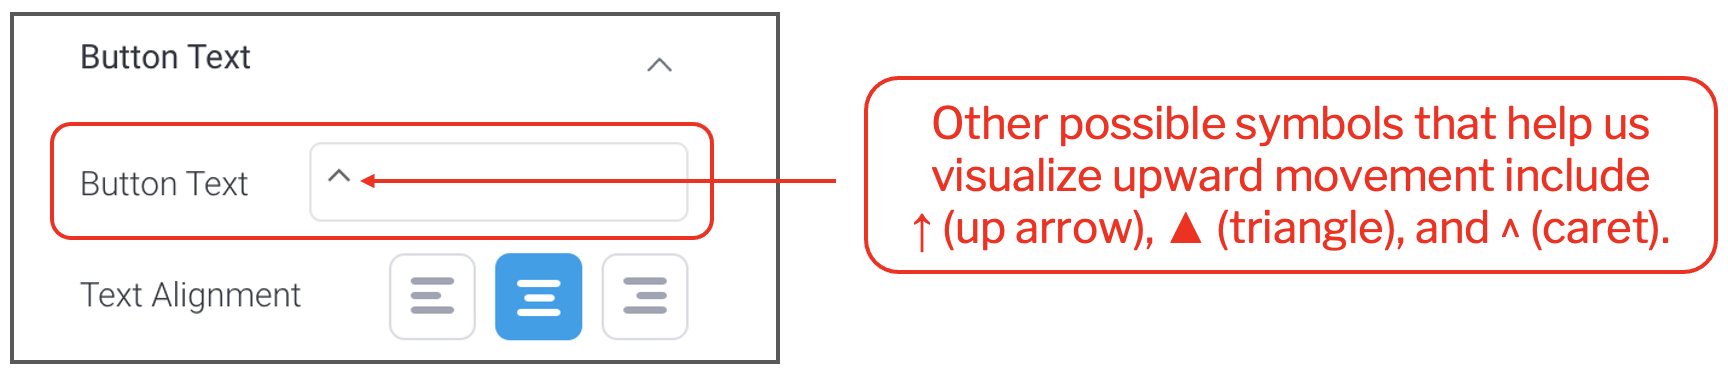
 For the button text, enter text that shows Back to Top. In this case, the character ‘⌃’ UP ARROWHEAD (Unicode: U+2303) is used.
If you use symbols, it is a good idea to check in advance that they will not be garbled.
For the button text, enter text that shows Back to Top. In this case, the character ‘⌃’ UP ARROWHEAD (Unicode: U+2303) is used.
If you use symbols, it is a good idea to check in advance that they will not be garbled.
 Once the action button is in place, check its behavior in preview mode.
Once you have confirmed the action button works, define the position of the button. To ensure the position of the button does not change even if you scroll it vertically, it is necessary to fix the position of the action button by specifying ‘position: fixed’ in the CSS in Code Mode, but there is one point to note here. The display position of the action button is directly described in the HTML tag as a style attribute, whereas the CSS in Code Mode is described in the head tag. CSS has a priority level called detail level, in which styles written in the style attribute of a tag have priority over styles written in the head tag. In other words, it is not possible to change the position of the action button simply by writing CSS in Code Mode. Therefore, we declare ‘!important’ to give the highest priority to styles written in CSS in Code Mode. The display position of the action button is specified by the top and left attributes, so we set each of them to auto and give them the highest priority with !important. This will cause the action button to be displayed at the position specified by the bottom and right attributes. canvas-button[name=”page_top”] { position: fixed; top: auto !important; left: auto !important; bottom: 10%; right: 5%; }
If you do not want to use !important
There is another way to avoid using "!important". You can simply remove the top and left specifications that are directly described as style attributes in the HTML tag of the action button. Display the HTML in code mode and find ‘page_top’ in the list of objects to identify the HTML description part of the action button. As shown in the below, there are parts where top and left are described, so remove these parts.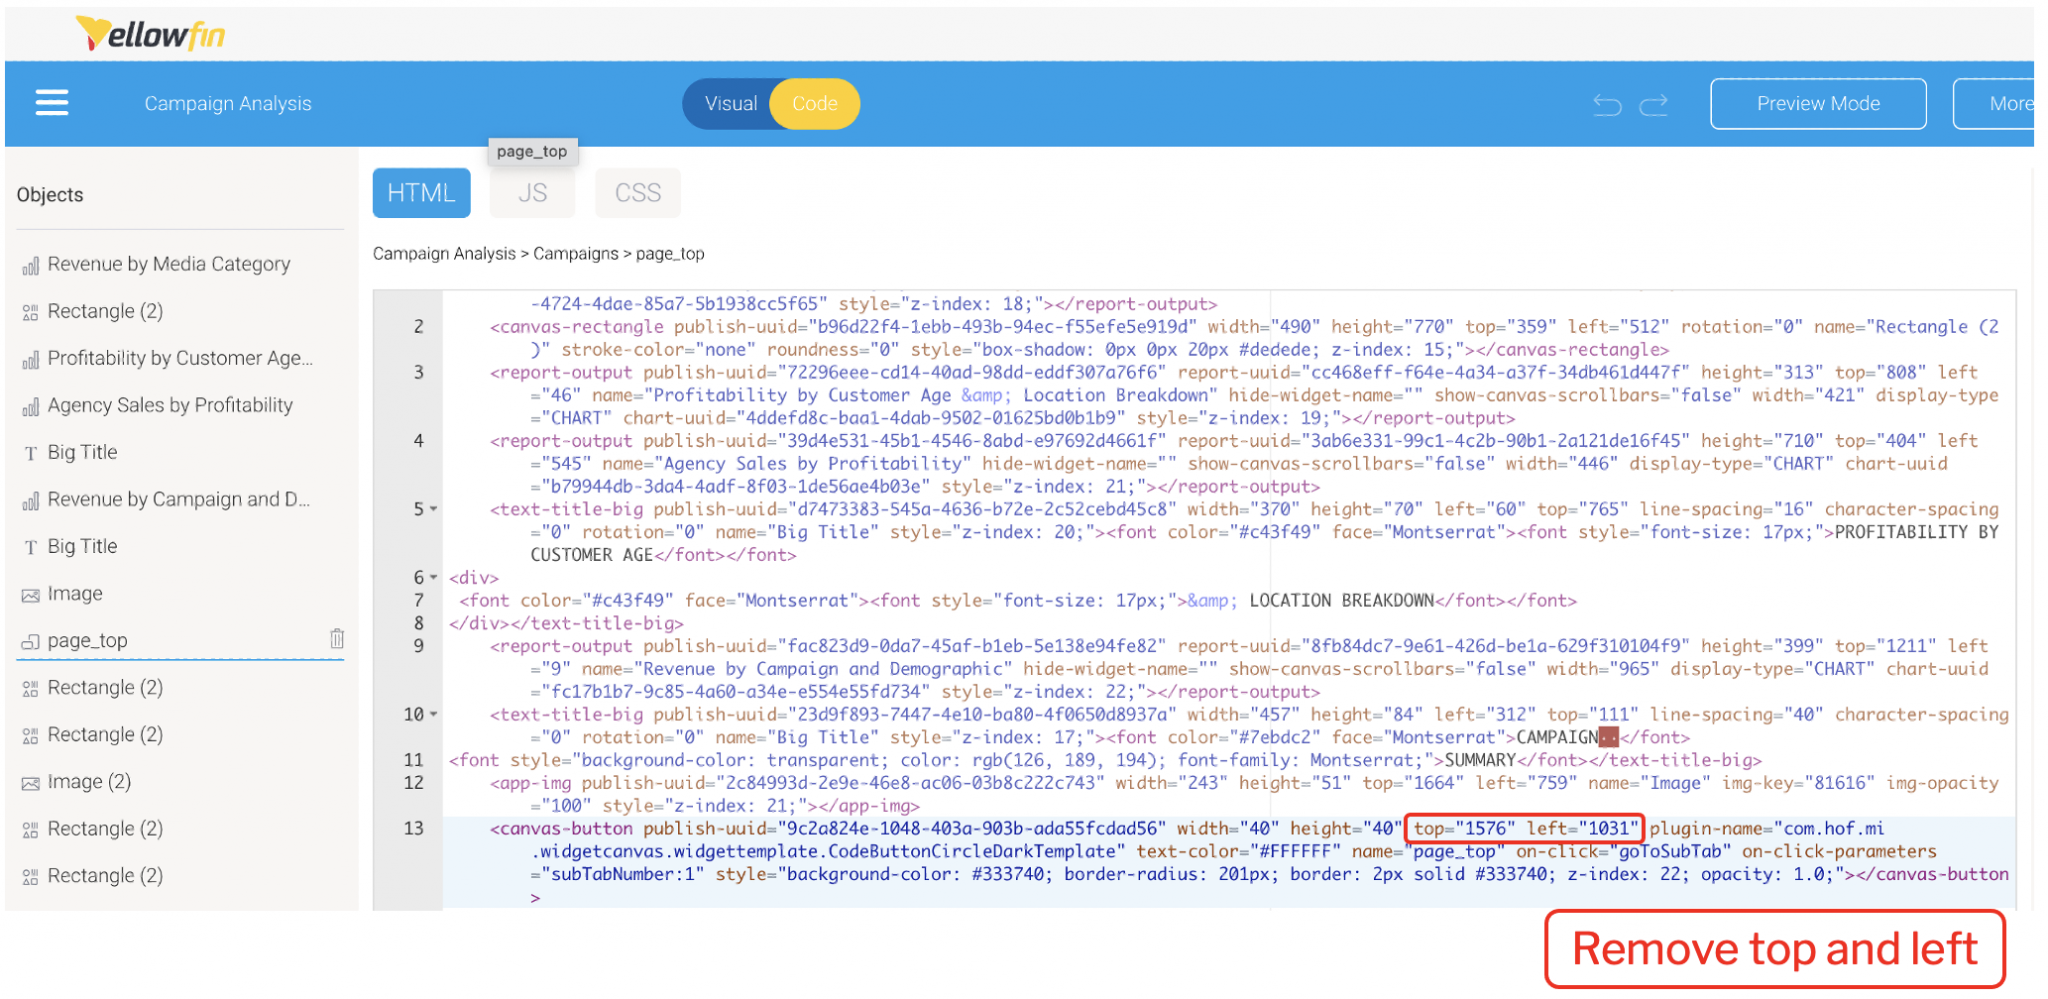 The CSS to be written in code mode will look like this.
canvas-button[name=”page_top”] {
position: fixed;
bottom: 10%;
right: 5%;
}
There is a point to be noted in this method.
Even if you remove the top and left specifications in code mode, if you change the properties of the action button in visual mode, such as the position and text, the top and left specifications will be restored. If you make any changes to the properties of the action button, remember to remove the HTML description in code mode.
The CSS to be written in code mode will look like this.
canvas-button[name=”page_top”] {
position: fixed;
bottom: 10%;
right: 5%;
}
There is a point to be noted in this method.
Even if you remove the top and left specifications in code mode, if you change the properties of the action button in visual mode, such as the position and text, the top and left specifications will be restored. If you make any changes to the properties of the action button, remember to remove the HTML description in code mode.