How To Capture Data using Yellowfin Data Transformation Flow
In our previous How to Design a Dashboard in Yellowfin: Part Two article, the Yellowfin Japan Team covered how to design a complete image of a dashboard, from start to finish, in our visual-based canvas interface. In this article, the team will demonstrate the necessary process to create the final dashboard.
Note: Throughout this series, field names will be written in [square brackets], Yellowfin settings and selections will be written in "double quotations", and parameters that must be entered manually will be written in enclosing lines and shadings. No specific rules are defined for (rounded brackets) or ‘single quotations’, so please read them as normal punctuation marks.
With that, let's get into it!
How to Use Data Transformation Flow in Yellowfin: An Overview
The Yellowfin Japan team has chosen to use the Yellowfin Data Transformation Flow feature to import Amazon order history data into the database. Here is what we will prepare this time.- Order history data (csv)
- Database to store the data
- Yellowfin installation
Creating a database
We will create a database in PostgreSQL to store the order history data and pgAdmin4, a GUI administration tool for PostgreSQL, makes it easy to create a database.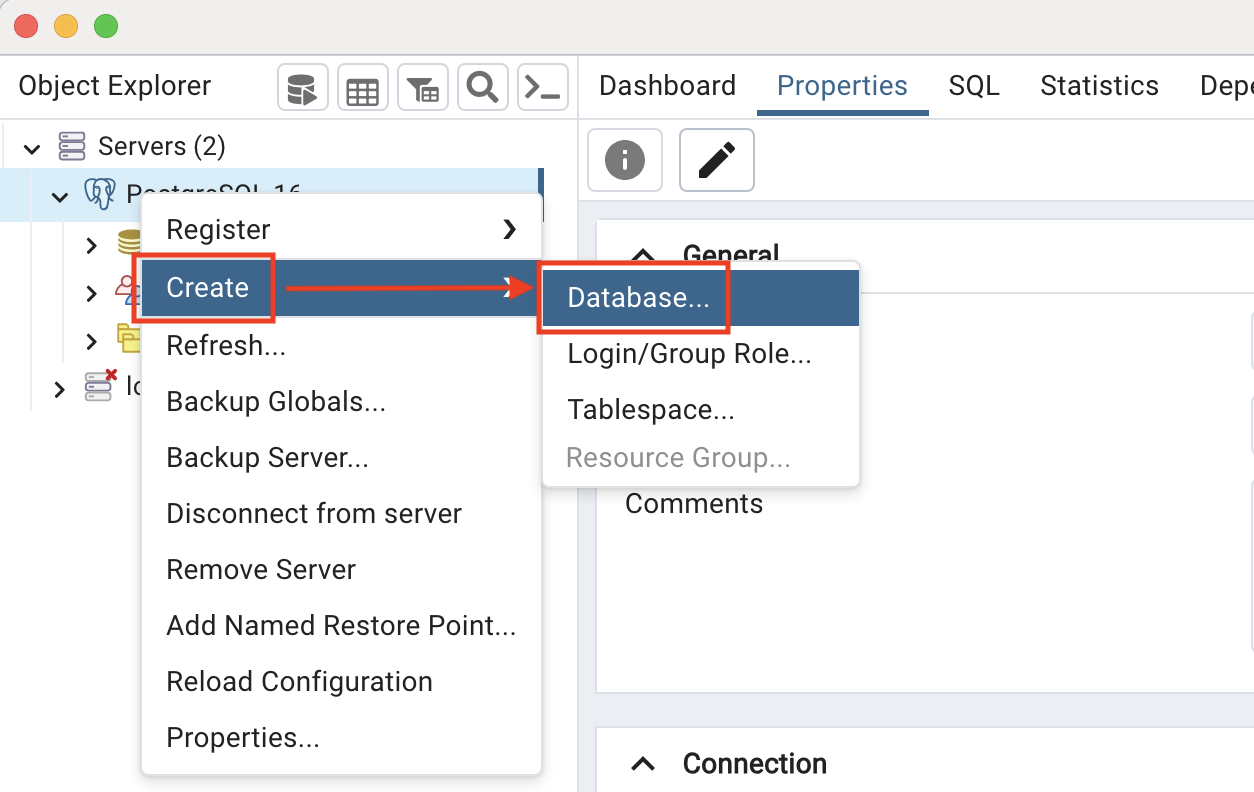 Using pgAdmin4, all it takes is one easy step of Right click > Create > Database.
For this example, we will create one database named ‘datawarehouce’.
Creating a data source connection
From here, we will connect Yellowfin to the database created in PostgreSQL. In the Advanced Connection Editor, expand "Usage Parameters" and enable "Writable" so that you can use the data transformation flow to get data into this database. The screenshot below demonstrates where you can enable this setting.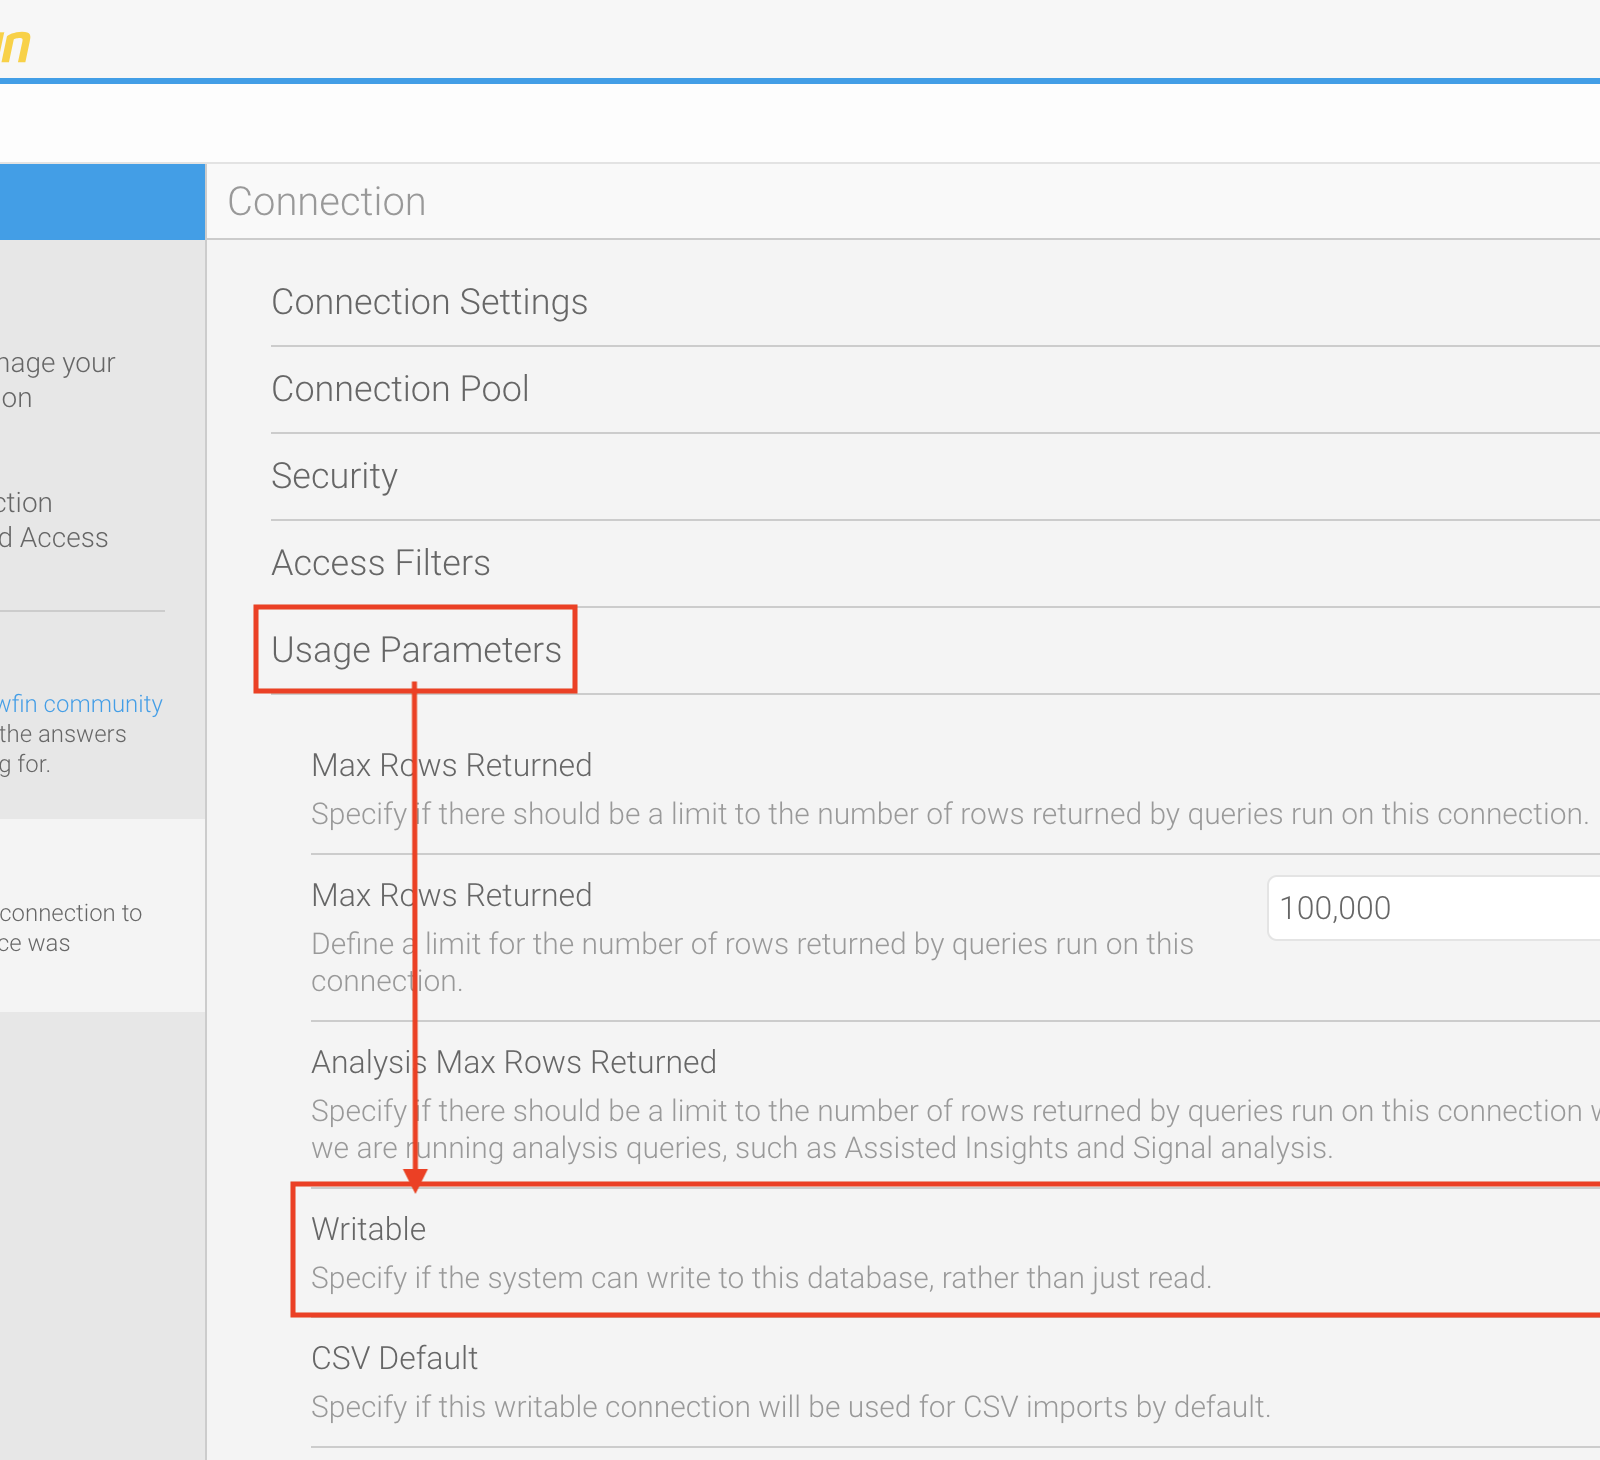 If you are following along, you are now ready to use Yellowfin Data Transformation Flow feature to import a CSV file of order history data into your database!
Creating a Data Transformation Flow
Three steps of Input Step, Filter Step, and Output Step are used to get the CSV file of the order history data into the database.1. Input Step
In the Input Step, we will upload the CSV file to Yellowfin and select the items to be used for analysis. This time, the following four items are required:- [Order Date]
- [Total Owed]
- [ASIN]
- [Product Name]
2. Filter Step
In the filter step, we will exclude rows that are unnecessary for analysis. Since the order history data includes canceled orders, we will set a filter with the condition that [Total Owed] is greater than 0 to exclude them.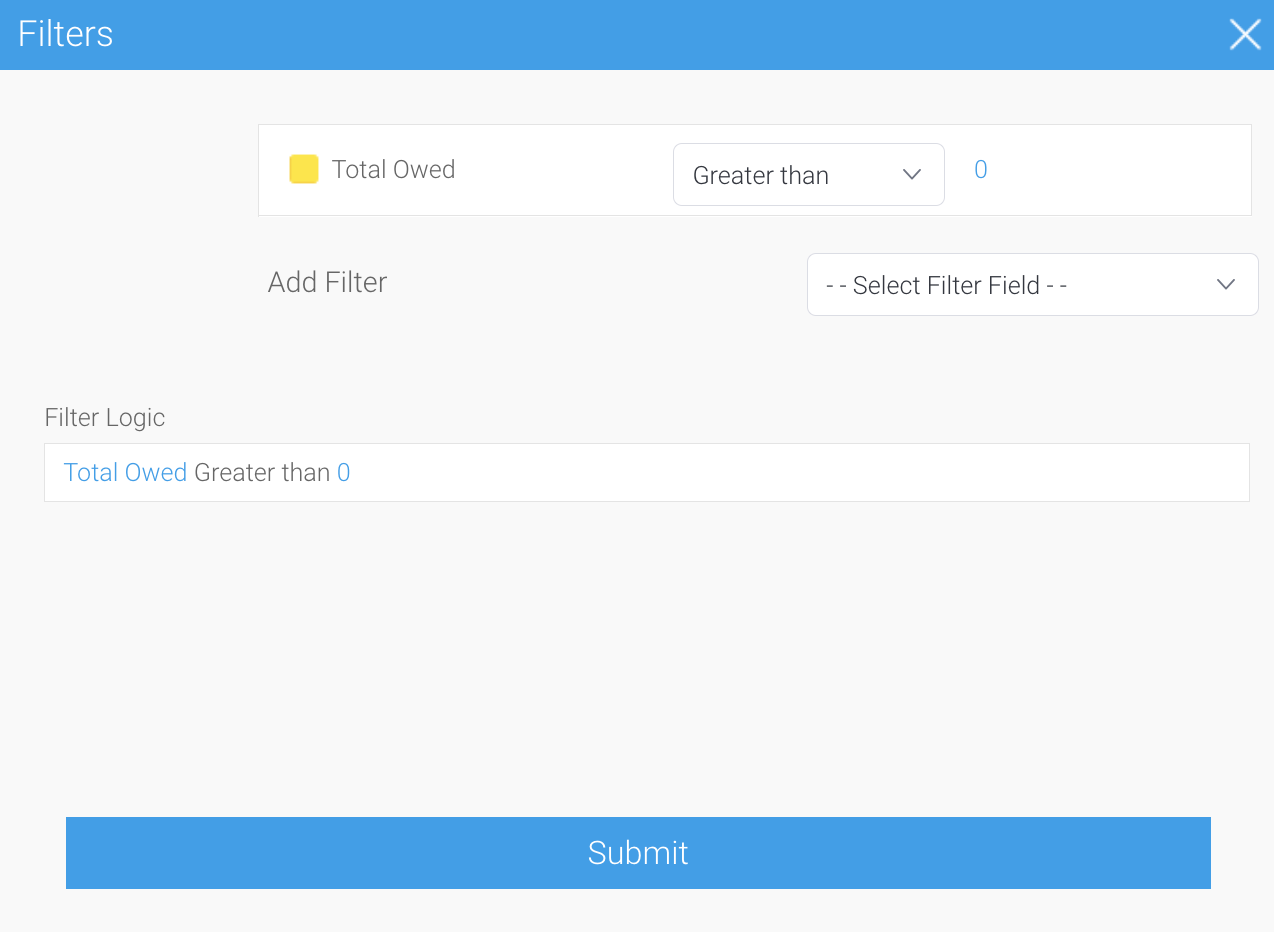 Note: The order history data has a field named [Order Status], but it seems that items canceled for Amazon's convenience or items that were delivered in error and treated as cancellations do not have a status of cancellation, so in this series, we will use [Total Owed] to determine the status.
Next, we will convert and format the data into a form that is easy to analyze. This can be done in other steps, but since we will not use other transformation steps this time, we will perform the transformation and format in the filter step.
Since [Order Date] is a string (TEXT), we will apply the Text to SQL Timestamp to convert it to a timestamp (TIMESTAMP). The date format is MM/dd/yyyy HH:mm:ss Z. By adding Z, the conversion from UTC to JST is also performed at the same time.
[Total Owed] is also a string (TEXT), and we want to convert it to a number (NUMERIC) using the Text to Numeric, but you should be aware that [Total Owed] contains commas as digit separators. If non-numeric characters or symbols are mixed in, an error will occur, so use Find and Replace to remove the commas, and then apply the Text to Numeric.
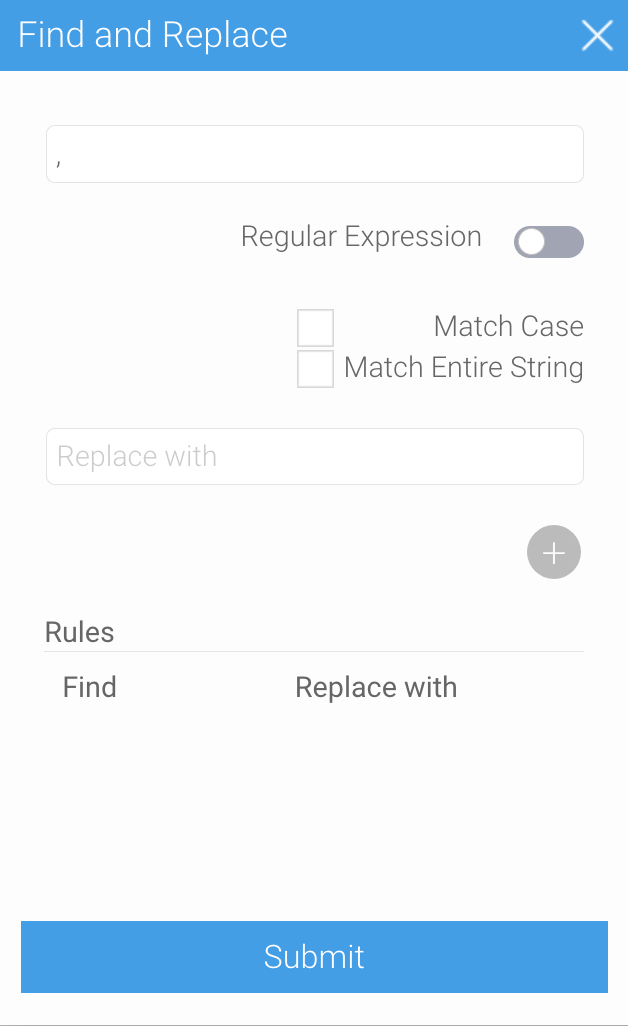 You can remove the digit-separated commas from [Total Owed] by adding a rule with , (comma) in the Search field and nothing in the Replace with field.
We need a field to categorize the products, so duplicate the [ASIN] field and create a field named [Category]. We then use Find and Replace on [Category] to convert the 10-digit [ASIN] to ‘books’ and ‘non-books’. Regular Expression can be used for easy conversion. Books can be categorized by ^[0-9][a-zA-Z_0-9]* and non-books by searching for ^B0[a-zA-Z_0-9]* respectively.
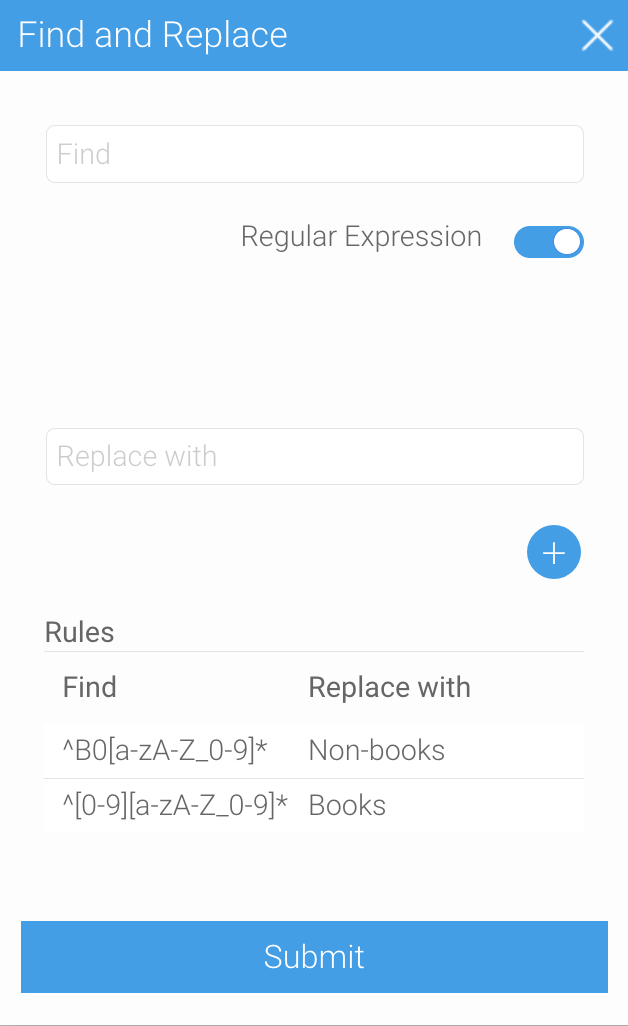 Don't forget to enable Regular Expression at this point in the process.
3. Output Step
In the output step, we will create a table in the database to store the processed data. In the “Select Database”, select the data source ‘datawarehouce’ that we initially created. For "Table Creation", select "Create If Does Not Exist". The name of the new table is simply ‘order’ since this is the table where the order history data will be stored. As for "Update Type," "Truncate" is fine, since the data will be imported only once this time.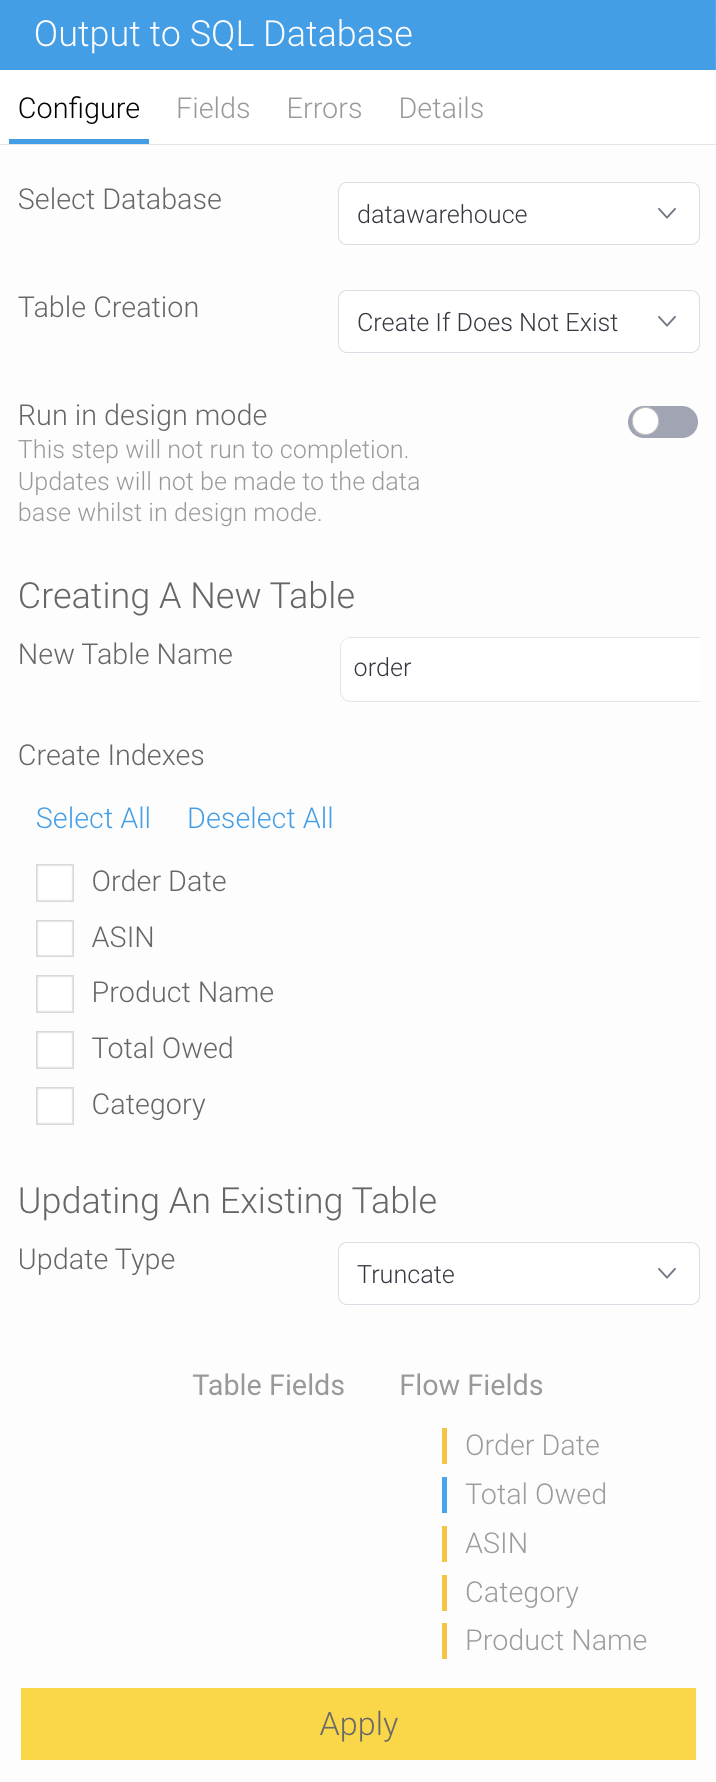 If we choose “Insert” as a “Update Type”, the data will increase each time it is executed, so choose “Truncate” instead.
Executing a Data Transformation Flow
Execute the saved Data Transformation Flow from the Browse page. Click the menu icon in the lower right corner or right-click to execute the data transformation flow.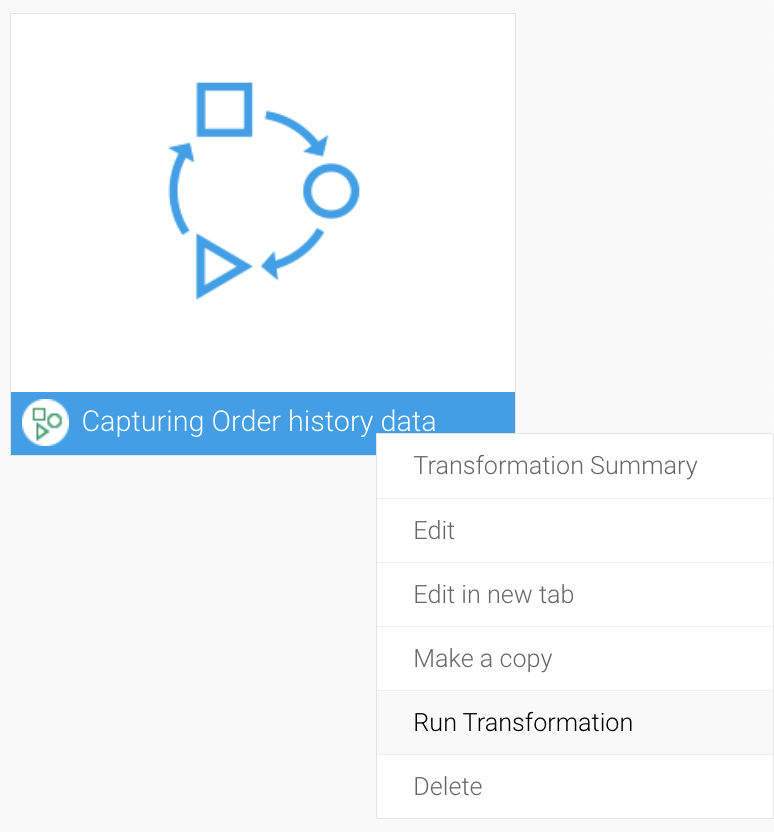 We execute it with right-click this time.
Once executed, a summary will be displayed. This data transformation flow is a small process, so you will not have to wait more than a few seconds for it to complete.
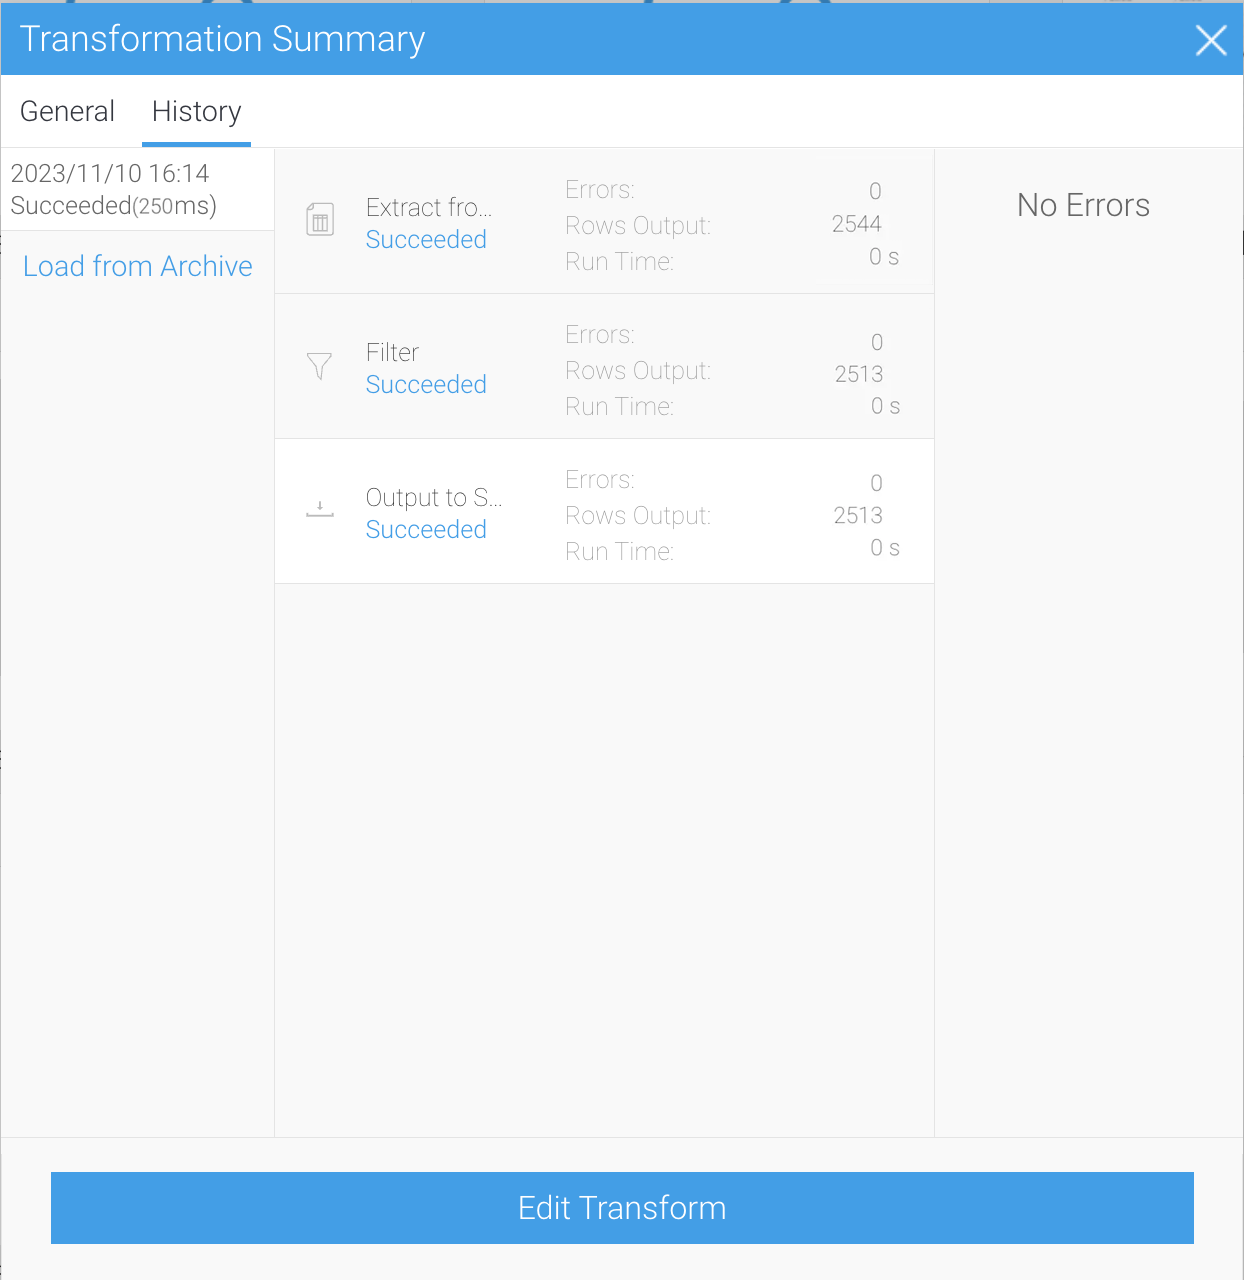 If the summary shows success, your data capture is successfully completed.
You can check from pgAdmin4 that the order table has been created and the data has been imported.
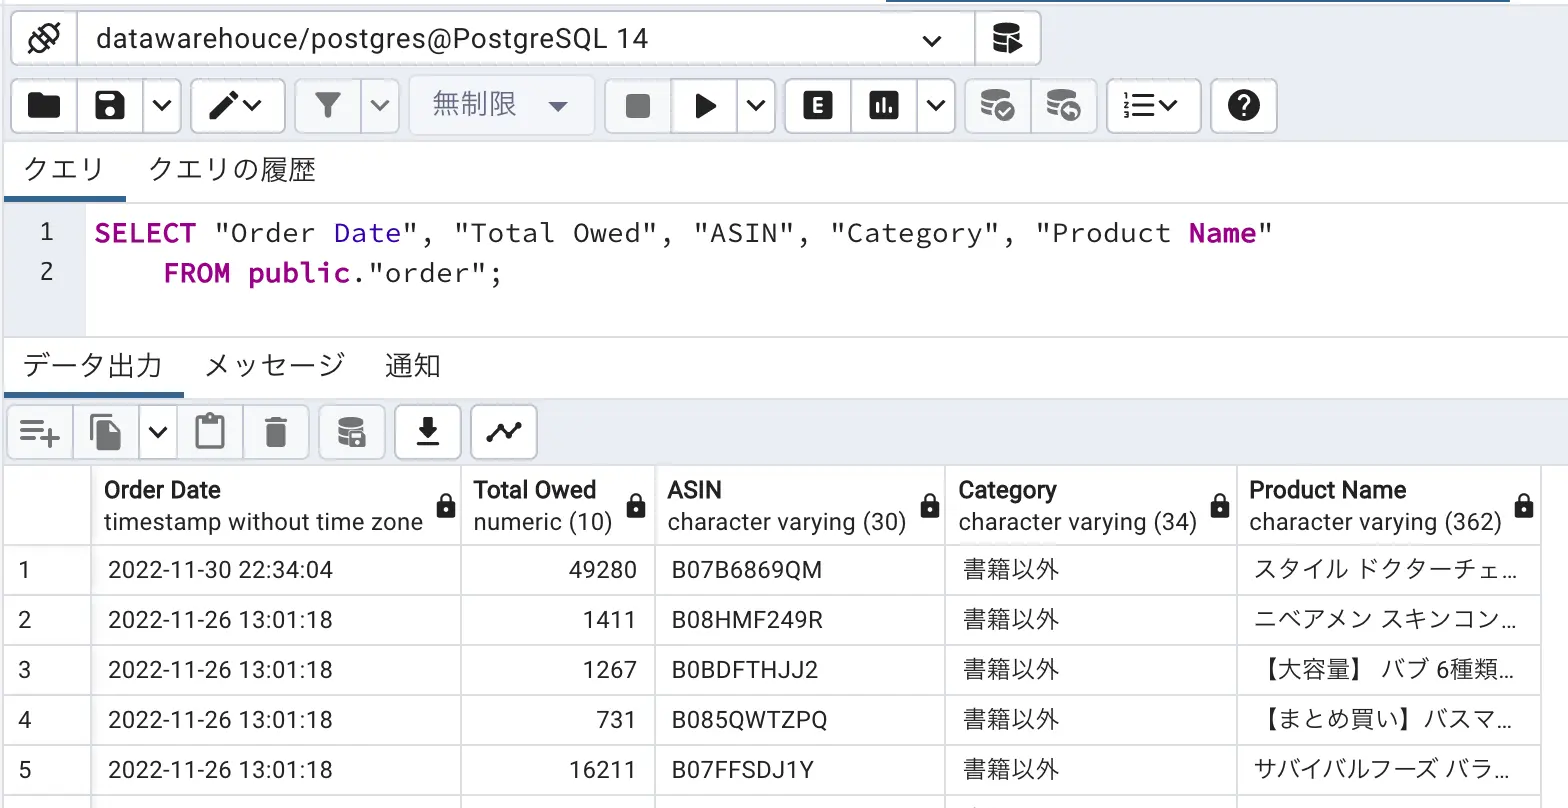 If you've been following along with our example in your own Yellowfin instance, we now have created a database of order history data.
In the next episode, we will use the Yellowfin View to prepare for data analysis.